2021 AutoCAD Tutorial: 6 Easy Steps for Beginners
Tweet
The most well-known CAD software worldwide is by no doubt AutoCAD. It was first released by Autodesk in 1982, and it now has a variety of applications for which it is used- such as architectural plans, layouts, and product manufacturing drawings. It is this versatile feature that has made AutoCAD industry standard software.
Basic Orientation
You will notice that The View Cube, in the top-right corner, is by default set to the top view. You will notice a little house symbol when you hover your mouse over it. For an isometric view click on it.
After this you?ll see a 3D Cartesian coordinate system in the middle of your drawspace, which has three axes, and there is also a change in position of the View Cube. To get the desired view you can click on its faces, edges, and corners.
Even though there are orientation tools contained in The NavBar, but usually for CAD software, there is a preference for mouse shortcuts. By simply holding down the wheel button and moving the mouse around you will be able to pan across the drawspace. Or, you can also click on the ?hand? (pan) icon on the NavBar.
To orbit around the center of the coordinate system of the drawspace you have to hold down the Shift key and the mouse wheel together. Alternatively, you can also click on an Orbit button on the NavBar.
After the basic orientation of the drawspace you have to start setting up your workspace to start 2D sketching.
Setting Up the Workspace
To customize theQuick Access Toolbar, click on the downward extend arrow. You will notice thata dropdown menu will pop up, you have to click on ?Workspace? to enable this feature.
A new button will be displayed in the Quick Access Toolbar.?Drafting & Annotation? is set by default, but you have to change it to ?3D Modeling? by clicking on it and then select that option from the dropdown menu. This will give you access to all 2D and 3D tools required for our tutorial.
Now to change units you have to click on the big red ?A? in the top-left corner. This will result in the opening of the AutoCAD menu.Then you have to go to ?Drawing Utilities > Units?. To use the metric system you have to change the ?Insertion Scale? to millimeters.
2D Sketching
Known for its drawing capabilities AutoCAD is best used for floor planning and layouts.
Snapping
One of the most useful features for sketching in AutoCAD is the Grip snapping. You have to press F9 on your keyboard to enable Grid Snap, you can also do so by clicking on enable ?Snap to Drawing Grid? at the bottom right-hand corner.
Now you have to click on the extend arrow next to the ?Snap to Drawing Grid button? and then select ?Snap Settings??. You will be able to adjust the grid and at the same time get the accuracy of the grid snap with this window. Then you have to go to the ?Object Snap? tab and enable it.
To activate snapping to corners, lines, points, and midpoints, among various other options you have to press F3. Now click on the extend arrow to select object snapping constraints. Then click on ?Tangent? to make it active.
You can try to toggle ?snapping? on and off in case you face problems with entering coordinates or sketching,and avoid usingthe Grid and Object Snap simultaneously. This is a helpful tool to draw sketches fast and to avoid holes in your sketch. Drawing Lines
To create your first sketch, click the View Club to select the top view and then disable Grid Snap with F9.
Next you have to either select the line command on the Ribbon or you can also type in ?line?. You can simply type the first letters of your command with AutoCAD, the software is able to autocomplete and show any available commands.
Selecting Objects
Left-click on the objects to select drawn objects. You can then unselect by simply holding down Shift and clicking again.
You can select multiple objects by left-clicking (do not hold it) and then move the mouse from left to right. All the enclosed object within the blue rectangle will be selected.By dragging from right to left, you?ll be able to select all objects that are touched by the green rectangle. Then click once again to confirm the selection.
Drawing Shapes
You will find a lot of easy ways to draw simple shapes using AutoCAD. To create a new form, draw a few shapes.
Next, you have to click the ?Rectangle? icon on the ribbon or even type it in on the command bar. Now, you have to enter the rectangle origin as (0,0), and then press Enter.
Spline
We will draw a spline next. With the help of the Spline tool, you will be able to create continuous curves between the connecting points.
Starting at the center point (0,0) you can create a spline. First, you have to add a distance then you have to enter an angle. To go to the next point, you have to hit Enter.
Trim
To remove extra lines up to an intersection you have to use the Trim command.
You have to start by typing ?trim? and then click on a line segment to erase it. You can click on the ?Undo? on the Quick Access Toolbar if you removed a line by mistake.
Mirror
A really important sketch tool is the mirror tool. It is extremely helpful when drawing symmetrical sketches, where drawing one half of a sketch and then mirroring it will do the job.
To select the entire sketch type in ?mirror? and then confirm with ?enter?. Then you have to select CenterPoint (0,0) as the first point of mirror line and then for the second point select a positive coordinate along the Y-axis.
Moving & Aligning Objects
When objects are all composed of multiple parts they can be ?assembled? together. Here is how you can move and assemble different 3D models.
Moving an object is very simple but it can be done in a number of ways. Here you can start by creating a cylinder centered at (0,0), 100 mm in diameter, and 500 mm in height.
3D Move
Now to move from the origin you have to type in ?3D move? and then confirm the command. You have to first select the parts to move. If you have a cylinder then select it and press Enter.
After this, you have to select a base point for the move. You can select the center point of the cylinder?s base with your mouse. Then press Enter to confirm.
After confirming where you want to move it, there are a number of ways by which you can move the cylinder around: you can do this with the mouse through the XY plane or even by entering a distance and direction for the movement through polar coordinates.
3D Rotate
You can also use simple rotation to manipulate objects. This is extremely useful for objects that are sketched in the XY plane but at the same time it requires repositioning.
You can lie down the cylinder bytyping in ?3D rotate? and then select the object, and press Enter. You will notice three circles surrounding the cylinder. Each corresponds to a rotation axis and you will understand that as they are colored accordingly.
Align
With the help of both the 3D Move and 3D Rotate tools you can manipulate objects in space easily. At times though you might need something which can work faster and it also more intuitive when it comes to moving and placing bodies.
This is when 3D Align is useful. With the help of this, you can quickly position two or more objects in relation to each other. Now create a sphere 30 mm in diameter centered at (0,0).
After which you have to type in ?align? and then confirm the command. Now you have to select the sphere only and then press Enter. Then you have to select the center of the sphere as the base point after which you have to select the center of one face.
You will notice that a straight line has been drawn, which then represents the movement of the sphere. You have to confirm by pressing Enter and you?ll notice that both shapes have aligned.
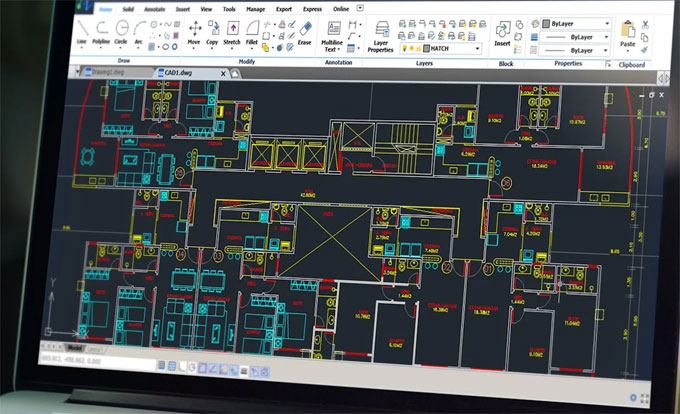
Image Courtesy: all3dp.com
Gallery
Feel free to contact us for BIM requirements. One of our representative will respond you within 24 Hours. Send us your projects requirement today and grow your project.
Explore More !